The fixing roller is commonly known as the heat roller, which is one of the components of the fixing unit. Its main function is to apply pressure to the fixing upper roller, and it has no drive itself. The power of its rotation comes from the friction of the fixing upper roller. The rotation of it and the fixing upper roller can fix the copied toner image through high temperature and send it to the paper output tray of the copier.
Steps to replace the fixing roller of Konica Minolta bizhub 283:
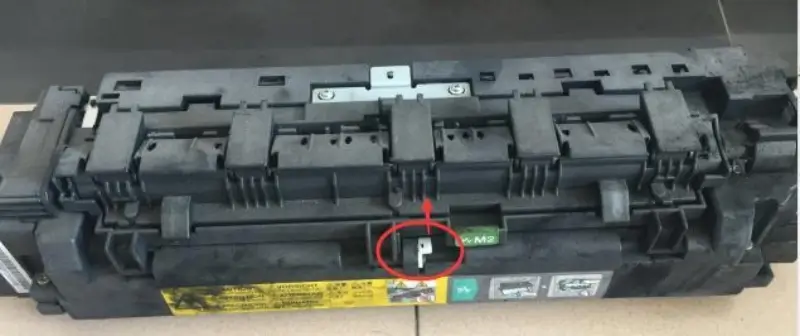
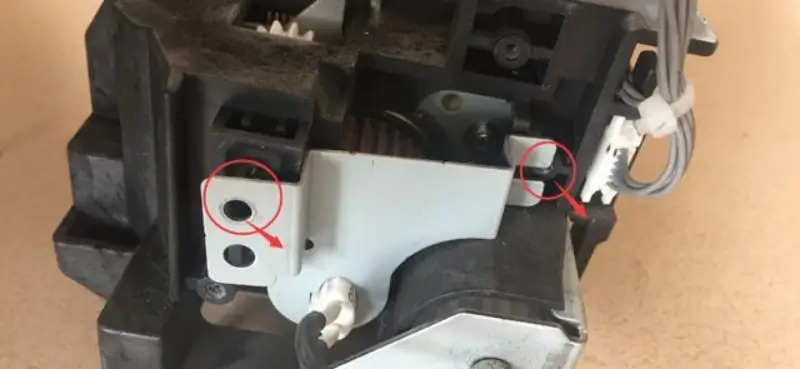
1. Remove the fixing assembly from the machine, remove the retaining ring as shown below, and remove the cover as shown below:
2. After removing the cover, remove the separation claw assembly as shown below:
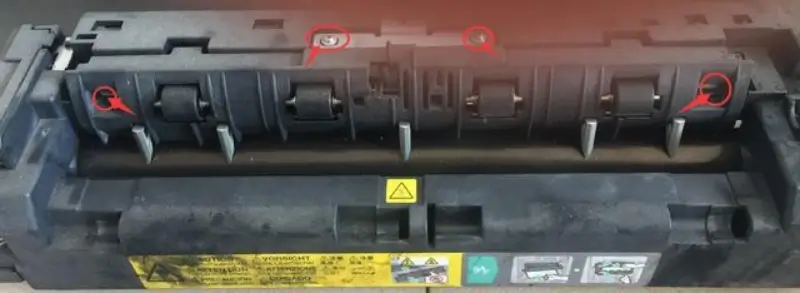
3. Unplug the sensor plug when removing the separation claw assembly.
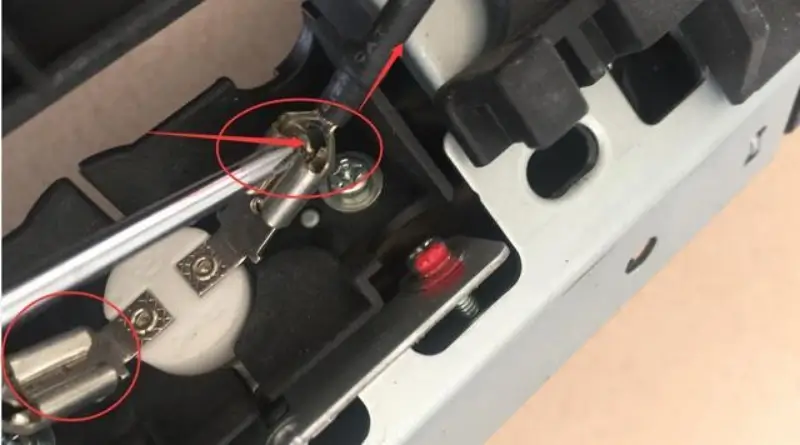
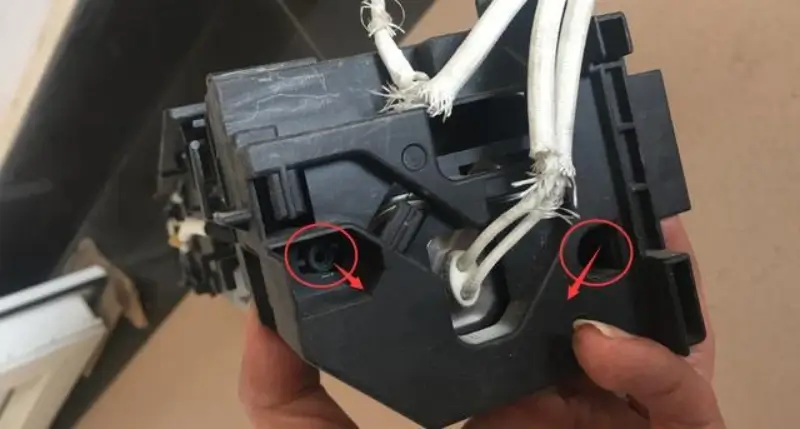
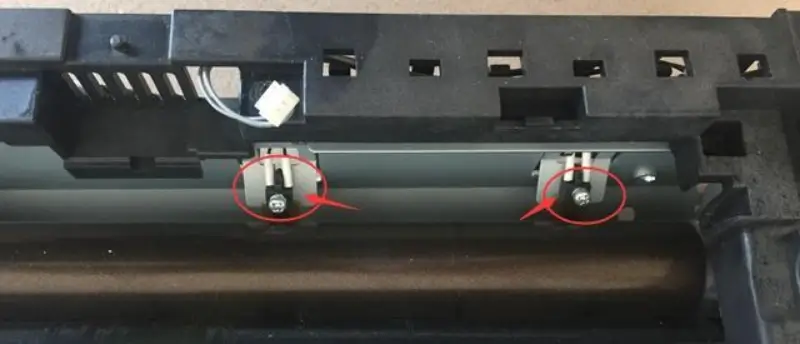
4. Remove the thermostat cover on the back and remove the thermostat plug of the heating tube as shown below:
5. Remove the covers on both sides of the fixing unit and the heating tube bracket.
6. Remove the thermal sensor.
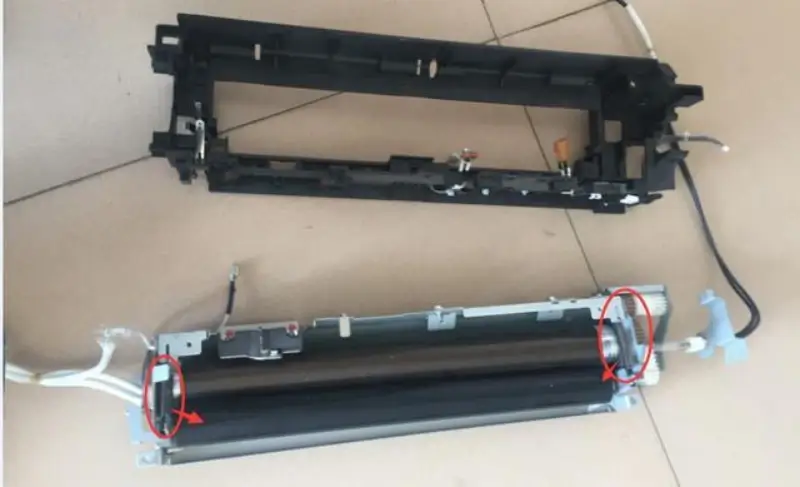
7. Remove the upper cover of the fixing assembly and the wires at the back.
8. Remove the spring of the lower roller.
9. Remove the lamp tube (note: the lamp tube is fragile, take it out gently).
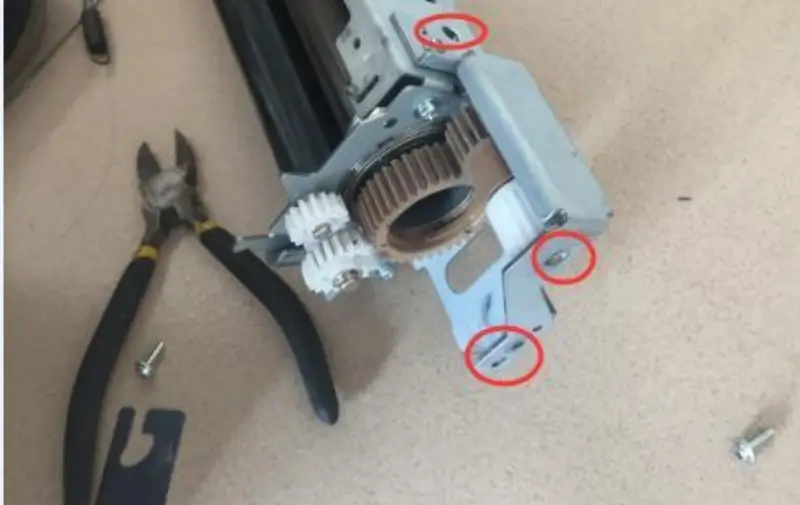
10. Remove the gear bracket.
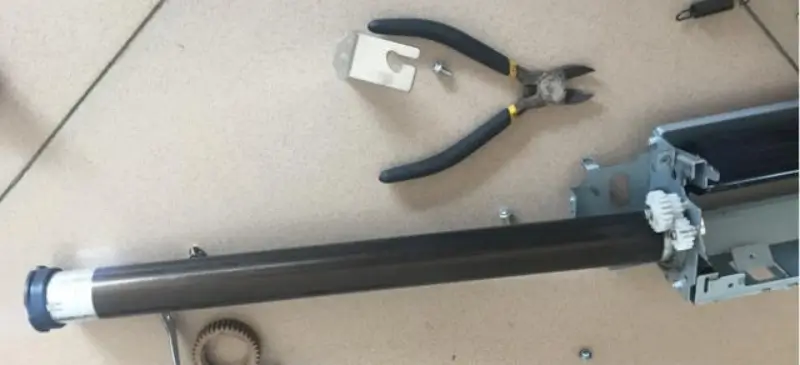
11. Remove the bearing of the heat roller, and then you can remove the heat roller.
12. Pay attention to cleaning the surface of the lower thermal sensor. If it is too dirty, the machine will report the C3421 error code or scratch the heat roller.
13. Reverse the operation to reinstall the fixing assembly. Be careful not to scratch the new heat roller during installation. When installing the lower roller, make sure that the bearings on both sides are in the bracket, otherwise uneven pressure will cause paper jams or paper pulls.
People also ask:
Q: How to replace heat roller on Konica Minolta Bizhub 223/363/7828?
A: Follow the same steps as above.






Leave A Comment