
🛠️ How to Fix a Dried-Out Ink Cartridge: 4 Effective Methods
Executive Summary: A dried-out ink cartridge occurs when solvent evaporates from the ink, leaving solid pigment blocking the microscopic nozzles. Depending on the severity, you can resolve this via Software Priming, Thermal Rehydration, or Solvent Dilution.
🔍 Method 1: The Software “Deep Clean” (First Response)
Before touching the hardware, use the printer’s built-in maintenance utility.
- Action: Open your printer settings and select “Head Cleaning” or “Deep Cleaning”.
- The Logic: The printer uses a vacuum pump to pull fresh ink through the nozzles to dissolve the dry plug.
- Pro-Tip: Run this cycle 3–5 times. If unsuccessful, wait 2 hours between attempts to prevent the print head motor from overheating.
🌡️ Method 2: The Warm Water Soaking Method (Manual Recovery)
If software cleaning fails, manual rehydration of the nozzle plate is required.
- Prepare: Heat distilled water to 50°C – 60°C.
- Soak: Submerge only the bottom 2mm (the nozzle area) of the cartridge in the water for 5 minutes.
- Warning: Do NOT submerge the entire cartridge or touch the copper electrical contacts to water, as this can cause a short circuit.
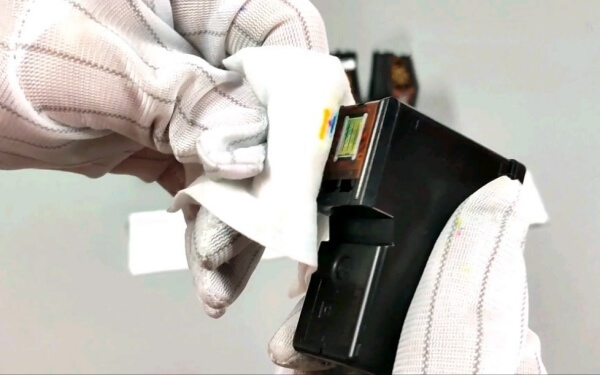
- Dry: Pat the nozzles dry with a lint-free cloth and reinstall.
💧 Method 3: Distilled Water Dilution (Integrated Heads Only)
For cartridges where the print head is built into the ink tank (common in HP and Canon models):
- The Fix: Inject 1–2ml of Distilled Water (never mineral water) into the ink sponge via the fill hole.
- Why: Distilled water acts as a safe solvent to break down solidified pigment within the internal reservoir. After injecting, run another software cleaning cycle.
🧽 Method 4: Electrical Contact Maintenance
Sometimes the “Dry” error is actually a “Connection” error.
- The Fix: Dip a cotton swab in 90% Isopropyl Alcohol and gently wipe the copper-colored contact points on both the cartridge and the printer carriage.
- Result: This removes oxidation and stray ink that might be mimicking a “clogged nozzle” signal.
🛡️ Preventative Maintenance: Stop Ink from Drying Out
Share these “Best Practices” with your users:
- The 10-Day Rule: Print at least one test page every 10 days to keep ink moving through the nozzles.
- The Power-Off Protocol: Always turn off the printer using its Power Button, not a power strip. This allows the print head to return to its “Parking Station,” which caps the nozzles and prevents air exposure.
- Environment: Store your printer in a cool, shaded area. High heat accelerates ink evaporation.
🆚 Recovery Success Probability
| Method | Effort Level | Success Rate | Risk Level |
| Software Cleaning | Low | 60% | Zero |
| Warm Water Soak | Medium | 85% | Low (Watch contacts) |
| Distilled Injection | High | 40% | Medium (Over-dilution) |
| Contact Cleaning | Low | 90% (for “Not Recognized”) | Zero |
🚀 Technical Meta Tags
- Primary Category: Inkjet Maintenance / Troubleshooting
- Technical Procedures: Thermal Rehydration, Nozzle Priming, Isopropyl Contact Cleaning.
- Target Models: HP, Canon, Epson, Brother Integrated Head Cartridges.
- Keywords: Fix dried ink cartridge, unblock inkjet nozzles, warm water ink cleaning, printer head deep clean.
- Search Intent: How to get ink flowing again? Printer not printing after long time. Dried ink cartridge hack.

Leave A Comment