
How to replace the toner cartridge chip?
The printer’s toner cartridge clearly has toner, the printed text is clear, and it can be used normally, but it often prompts to replace the toner cartridge and cannot print. Even if the toner is refilled, it will still prompt to replace toner cartridge. In fact, the main reason for this situation is that the printer writes the information of insufficient toner and exhausted toner into the chip, and this information is always saved by the chip and is irreversible. In other words, the chip data is rewritten and can only be solved by changing the chip.
How to replace the toner cartridge chip? It’s very simple. Take out the chip first, and then install the new chip in the original position.
Please see the specific steps of the “How to replace printer toner chip” tutorial below:
1. Take out the printer toner cartridge.

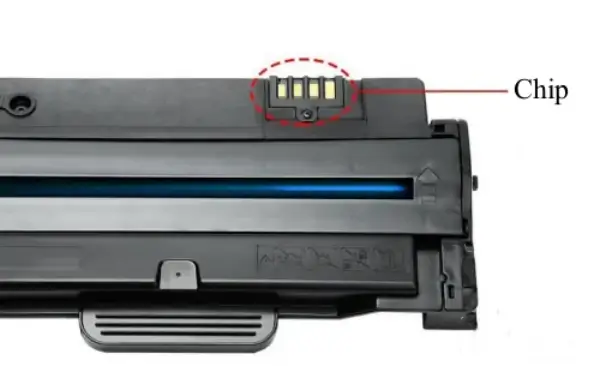
2. Find the location of the toner cartridge chip, as shown in the figure below:
3. Use a screwdriver to remove the fixing screws of the chip protective cover.

4. Remove the protective cover. Some toner cartridges’ protective covers are not so easy to remove, but after they are loosened, you can use your hands to pry open a little gap to remove the chip.

5. Take out the new chip and install it in the same direction as the old chip. Be sure not to install it in the wrong direction, otherwise it will not work.

6. After the installation is completed, adjust the chip protection cover to the right position, and then tighten the screws.

Summary:
Although the position of the chip in different printers is different, the general removal method is similar. Just follow the above method to find the trick.
Leave A Comment